How To Make Digital Planner To Sell On Etsy?
Are you interested in creating a digital planner to sell on Etsy?
Well, you’re in luck because we’ve got a comprehensive guide to help you get started.
Whether you’re a planner enthusiast looking to turn your passion into profit or a creative soul wanting to share your designs with the world, this article will walk you through the process step by step.
So, grab a cup of your favourite beverage, settle in, and let’s dive into the exciting world of making and selling digital planners on Etsy!
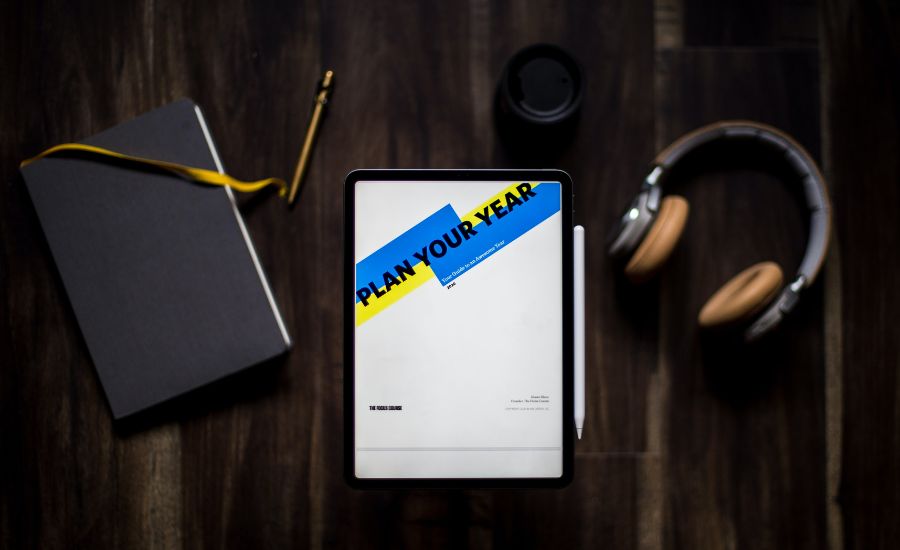
What Is Digital Planner?
A digital planner is a newer version of the classic paper planner made specifically for use with tablets and smartphones.
It offers tools for scheduling, task management, and goal tracking, as well as interactive elements and layouts that may be customized.
It offers a digital option for organizing and planning everyday activities and events.
10 Steps to Start Digital Planner Business On Etsy
1. Identify your target audience
Determining your target audience is crucial as it will influence the design, content, and marketing strategies for your digital planner.
Consider factors such as age group, profession, hobbies, and interests.
For example, if you choose students as your target audience, you may focus on academic planning, goal setting, and study trackers.
2. Research and plan
Conduct market research to understand the needs and preferences of your target audience.
Look for popular digital planner themes, layouts, and features.
Browse through Etsy and other platforms to see what is currently selling well and identify any gaps or opportunities.
Make a list of the key features you want to include in your planner, such as monthly calendars, weekly spreads, to-do lists, habit trackers, and note sections.
3. Choose your digital planning format
Select the digital format in which you want to create your planner.
PDF is a common choice as it can be easily viewed and printed on various devices.
PowerPoint or Keynote can offer more customization options, allowing users to edit and add their own content.
Procreate is a popular option for iPad users who prefer a more artistic and interactive planner.
4. Design your planner
Use design software or tools relevant to your chosen format to create your planner.
There are numerous design tools available, ranging from free options like Canva to more advanced software like Adobe InDesign.
Focus on creating visually appealing layouts, choosing complementary colors, and selecting fonts that are easy to read.
Ensure that the planner is user-friendly and intuitive, with clear instructions on how to use it.
5. Add functional elements
Incorporate the key features you identified earlier, such as calendars, weekly spreads, and trackers.
Consider adding extra pages for goal setting, budgeting, meal planning, or other relevant sections.
Ensure that the planner includes clickable hyperlinks or navigational elements for easy access to different sections.
6. Test and refine
Thoroughly test your digital planner to ensure that it is error-free and functions properly.
Make sure all interactive elements work as intended, and check for any formatting issues.
Ask friends or beta testers to provide feedback and make necessary improvements based on their suggestions.
7. Package your product
Create an attractive cover page and an appealing preview of your digital planner.
This will help attract potential buyers and give them a glimpse of what they can expect.
Consider creating multiple versions or bundles to cater to different customer preferences or offer additional value.
8. Set up your Etsy shop
Sign up for an Etsy seller account if you haven’t already.
Create a shop name and description that clearly communicates what your digital planner offers.
Upload high-quality product images and write compelling descriptions highlighting the unique features and benefits of your planner.
9. Set Competitive pricing
Analyze the pricing plans for digital planners that fit your niche.
Think about things like the complexity of your planner, the time and work put into making it, and the perceived worth.
Consider Etsy fees as well as any additional charges you may incur.
Experiment with various pricing points to discover the best combination of profitability and market demand.
10. promote your planner
Develop a marketing plan to increase visibility and drive sales. Utilize social media platforms, email marketing, and paid advertising to reach your target audience. Collaborate with influencers or bloggers in your niche to promote your digital planner. Engage with your potential customers by providing valuable content related to planning and organization.
Is Selling Planners On Etsy Still Profitable?
Yes, selling planners on Etsy is still be profitable. Because of the growing popularity of digital planning and the platform’s enormous client base, there is a desire for one-of-a-kind and well-designed planners. The key to success is to target the correct audience, offer high-quality products, and use successful marketing methods.
How To Make Digital Planner On Canva To Sell On Etsy?
Creating digital planner on canva is quite easy to create. You can follow these simple steps to create your first planner that can be worth few dollars.
- Plan Your Digital Planner:
- Determine the type of planner you want to create (daily, weekly, monthly, etc.).
- Decide on the layout, design, and color scheme.
- Identify the sections, features, and pages you want to include (e.g., calendars, to-do lists, habit trackers).
- Set Up Your Canva Account:
- Sign up or log in to Canva (canva.com) if you don’t have an account.
- Upgrade to Canva Pro if you need access to premium features (optional, but can be beneficial for advanced editing).
- Create a New Design:
- Click on “Create a design” on the Canva homepage.
- Enter custom dimensions for your planner pages (e.g., 8.5×11 inches or 210x297mm).
- Alternatively, you can choose a pre-made template from the Canva template library and customize it according to your needs.
- Design Your Planner Pages:
- Use Canva’s drag-and-drop interface to add text, images, shapes, and other design elements.
- Customize the fonts, colors, and sizes to match your branding or desired aesthetic.
- Add functional elements such as checkboxes, lines, or tables to make your planner interactive and user-friendly.
- Create multiple pages for different sections of your planner.
- Save and Export Your Planner:
- Once you’re satisfied with your design, save your planner pages individually or as a complete document.
- Export each page as a high-resolution PDF file (or other compatible file format).
- Consider adding security features like password protection or watermarking to protect your work.
- Package Your Digital Planner for Etsy:
- Prepare a cover page or preview image that showcases your planner.
- Create a product description that highlights the features and benefits of your digital planner.
- Set a price for your planner and choose the appropriate category on Etsy.
- Determine whether you want to offer your planner as an instant download or a customizable template.
- Create an Etsy Listing:
- Sign in to your Etsy account (or create one if you do not already have one).
- To create a new listing, click “Sell on Etsy” and follow the directions.
- Upload your planner’s cover image and write a catchy title and description.
- Set the price, quantity, and other pertinent information.
- Select the correct digital file category for your planner.
- Add relevant tags to your listing to help potential customers find it.
- Publish and Promote Your Listing:
- Review your listing for accuracy and make any necessary edits.
- Publish your listing on Etsy and make it available for sale.
- Promote your digital planner through social media, your website (if you have one), or other marketing channels to reach a wider audience.
Final Words
Congratulations!
You’ve reached the end of our guide on how to make and sell digital planners on Etsy.
Armed with our expert advice, you’re now equipped to create stunning planners that will captivate customers and boost your sales.
Remember to keep refining your designs, listening to customer feedback, and staying on top of trends.
With dedication and creativity, your Etsy shop can become a go-to destination for digital planners.
So, go ahead and unleash your imagination, and watch your digital planning business thrive.
Best of luck on your exciting entrepreneurial journey!